
Introduction: Why Bathroom Ceiling Mold Needs Immediate Attention
The bathroom is one of the most used spaces in your home. But at the same time it is also one of the neglected area of the home, when it comes to hidden problems. One of the most common issues you may face in your bathroom is mold on the bathroom ceiling. What might start as a few spots can quickly grow into an unsightly and unhealthy problem if ignored.
With over several years of experience, we know how mold can ruins the clean look of your bathroom and may also affects indoor air quality and even the structure of your ceiling. Mold thrives in warm, damp, and poorly ventilated spaces, making bathrooms the perfect breeding ground. If it is left untreated, it can damage paint, drywall, and create potential health risks for you and your family.
Whether you’re living in White Rock or any corner of Canada. Mold doesn’t care where you live, it grows wherever moisture lingers. But with the right approach like identifying the source, checking for leaks, and by using safe cleaning solutions, mold can be removed safely and effectively.
In this guide, we’ll explore how to remove mold from your bathroom ceiling and also the best practices for keeping it from coming back, so your bathroom feels fresh, clean, and truly healthy shining bathroom year-round.
Why Bathroom Ceiling Mold Happens and How It Affects Your Home

A moldy bathroom ceiling is a warning sign that for you that your space has excess moisture and poor ventilation. In bathrooms, mold often shows up as black, green, or brown spots, typically in corners, near light fixtures, or around exhaust fans. If left unchecked, it can make situation worst in its way into drywall, paint, or plaster, leading to costly repairs and even health issues like allergies, respiratory problems, and skin irritation.
We all know warm, dark, and damp environments is the house of mold. Ans it is exactly what a bathroom ceiling becomes after a hot shower or bath. Steam condenses on the ceiling, and if the room isn’t ventilated properly, that moisture lingers, creating a perfect environment for mold to grow.
Understanding the root cause of mold is key to removing it effectively. Check whether it is poor ventilation, a hidden leak, or plumbing issues. Once you know the source, you can choose the safest and most efficient cleaning method. With the right approach, mold can be eliminated, and your bathroom ceiling can stay clean, healthy, and fresh-looking.
We suggest you to check the proper root cause of mold in your bathroom ceiling. And then go for the solutions.
Identifying Different Types of Mold in Bathroom
Bathroom ceiling mold can vary in color and texture. The most common types found include:
- Black mold (Stachybotrys chartarum): Slimy, dark greenish-black, and potentially toxic. This type of mold is especially concerning and may require professional treatment.
- White mold: Powdery in appearance and often mistaken for efflorescence, which is a mineral deposit rather than a fungus.
- Green mold: A common mix of various fungi and bacteria, frequently found on bathroom ceilings, tiles, and damp walls.
Recognizing the type of mold you’re dealing with is an important step in determining how to remove mold from bathroom ceiling safely and effectively. Different molds may require different cleaning methods, and identifying them early helps prevent further spread. If you’re unsure about the type or severity of the mold, it’s always best to test a sample or consult a professional before starting the cleaning process.
What Really Causes Mold on Your Bathroom Ceiling?
Bathrooms are naturally damp spaces, and that moisture can easily turn into a mold problem if not managed properly. Steam from hot showers, high humidity, and lingering condensation all settle on ceilings, especially in corners, near light fixtures, or around exhaust vents. Over time, this trapped moisture creates the perfect environment for mold to grow.
To prevent serious damage and health risks, we believe it’s crucial to know how to remove mold from bathroom ceiling the right way. With the right tools, techniques, and safety precautions, you can tackle mold effectively and restore your bathroom to a fresh, clean state.
Here are the most common culprits behind bathroom ceiling mold:
- Poor ventilation or no exhaust fan – Without proper airflow, moisture has nowhere to escape.
- Leaky pipes or fixtures – Even small leaks can keep surfaces damp and accelerate mold growth.
- Infrequent cleaning – Mold thrives on dust and soap residue that builds up over time.
- High humidity levels in the home – Homes without proper humidity control make mold more likely, especially in bathrooms.
With the right safety precautions, you can safely remove mold from bathroom ceiling and can restored to a clean, healthy space.
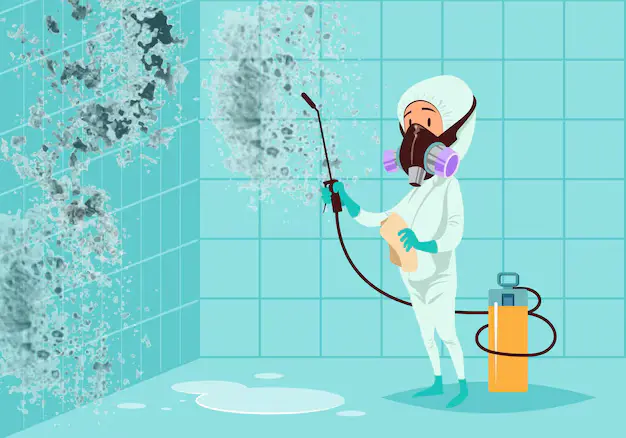
Step-by-Step Guide to Removing Mold from Your Bathroom Ceiling

Noticing dark patches or discolored spots creeping across your bathroom ceiling? You shouldn’t ignore them. Ignoring them won’t make them disappear. Knowing how to remove mold from bathroom ceiling safely and effectively is essential for any homeowner.
At Mesh Maids, we help homeowners tackle mold problems thoroughly while minimizing risk and preventing recurrence through this guide. Here’s a step-by-step guide you can follow at home using DIY solutions.
What You’ll Need
Before you start, gather the following supplies:
- Protective gear (gloves, goggles, face mask)
- Step ladder
- Plastic sheeting or drop cloth
- Scrub brush or sponge
- Spray bottle
- Cleaning solution (see DIY options below)
- Old towels or microfiber cloths
- Ventilation fan or dehumidifier (optional)
DIY Cleaning Solutions That Work
If you’re wondering how to remove mold from bathroom ceiling without resorting to harsh chemicals or professional services, there are several effective DIY solutions you can try using common household items. These natural cleaners not only eliminate mold but also help prevent it from returning—making them a safe and affordable option for homeowners.
From vinegar and baking soda to hydrogen peroxide and tea tree oil, the right combination can tackle mold while keeping your bathroom fresh and toxin-free.
1: Vinegar
- White distilled vinegar is a natural antifungal and antibacterial solution.
- Pour vinegar into a spray bottle (undiluted).
- Spray directly on mold and let sit for 1 hour.
- Scrub gently and wipe clean.
2: Baking Soda + Water
- Baking soda is mild but effective for light mold buildup.
- Mix 1 tablespoon of baking soda in a spray bottle with water.
- Spray, scrub, and rinse the area.
3: Hydrogen Peroxide
- Hydrogen peroxide (3%) is a strong antifungal and whitening agent.
- Spray it directly on the mold.
- Let it sit for 10–15 minutes before scrubbing.
Note: Never mix hydrogen peroxide and vinegar together—it creates harmful fumes.
4: Tea Tree Oil
Tea tree oil is a powerful natural antifungal with a strong scent and excellent mold-fighting properties.
- Mix 1 teaspoon of tea tree oil with 1 cup of water in a spray bottle.
- Shake well and spray directly onto the moldy area.
- Let it sit without rinsing—tea tree oil continues to work even after application.
- Wipe off excess moisture, but do not rinse completely to allow continued protection.
5: Borax Cleaning Method
Borax is a naturally occurring mineral and an EPA-recognized mold remover that not only kills mold but also prevents it from returning by leaving a protective residue.
- Mix 1 cup of borax with 1 gallon of warm water in a bucket.
- Stir thoroughly until the borax is fully dissolved.
- Use a sponge or brush to apply the solution directly onto the moldy ceiling.
- Scrub gently to loosen mold, then let the solution sit without rinsing.
- Allow the area to air-dry completely—borax leaves behind a mold-resistant layer that helps prevent regrowth.
These DIY remedies are simple yet effective ways to maintain a clean, mold-free bathroom. By using natural ingredients, you not only protect your health but also your home’s surfaces. Remember, knowing how to remove mold from bathroom ceiling the right way can save you time, money, and long-term damage.
Safe Cleaning Process to remove Mold from Bathroom Ceiling
When learning how to remove mold from bathroom ceiling, following a safe and structured cleaning process is essential to protect both your health and your home. Mold cleanup can expose you to allergens and spores, so proper preparation and care are key.
- Protect the area: Lay down plastic or drop cloths to protect the floor and fixtures.
- Ensure ventilation: Open windows, turn on fans, or use a dehumidifier to circulate air.
- Spray the cleaner: Apply your chosen solution generously.
- Wait and scrub: Let it sit for the recommended time, then scrub with a brush or sponge.
- Rinse and dry: Wipe down the surface with a damp cloth, then use a dry towel to remove excess moisture.
- Dispose safely: Discard used rags and gloves in a sealed bag.
By following these safety steps, you’ll not only reduce exposure to harmful spores but also increase the effectiveness of your efforts. With this process, you’re one step closer to mastering how to remove mold from bathroom ceiling the right way.
When to Call the Professionals
If the mold covers a large area (more than 10 square feet), has penetrated drywall, or if you suspect it’s toxic black mold, it’s time to call a certified mold remediation expert. Professionals use HEPA-filter vacuums, antimicrobial treatments, and moisture meters to ensure complete removal and future prevention.
Natural Prevention Sprays
You can make a mold-prevention spray using:
- 1 cup water
- 1 tablespoon tea tree oil or eucalyptus oil
- 1 tablespoon white vinegar
- Spray lightly on ceilings and corners after cleaning sessions.
By maintaining a dry environment and acting quickly when moisture appears, you can stop mold before it starts. Combine these habits with what you’ve learned about how to remove mold from bathroom ceiling to keep your space healthy. Prevention is always easier—and cheaper—than repeated removal.
How to Prevent Bathroom Ceiling Mold: Pro Tips from Mesh Maids
Even after you know how to remove mold, staying ahead of it requires smart, consistent habits. That’s why we are sharing these professional tips that will help you to protect your home, prevent mold from returning, and make cleaning easier.
Ventilate strategically – You should open windows or use an exhaust fan during and after showers. For bathrooms without windows, consider a portable dehumidifier to keep moisture levels below 50%.
Check hidden moisture hotspots – Inspect behind light fixtures, vent grills, and crown molding, where condensation often collects unnoticed.
Monitor humidity with a hygrometer – Tracking indoor humidity helps you prevent mold before it starts. Many homeowners don’t realize a high humidity reading can silently fuel mold growth.
Use mold-resistant coatings – Consider applying a mold-resistant paint or primer on ceilings, especially in older bathrooms. This preventative layer adds long-term protection.
Regularly clean exhaust fans and vents – Dust and debris can block airflow, trapping moisture and creating a perfect breeding ground for mold.
DIY is great for small patches, but know your limits – While vinegar, tea tree oil, or borax work for minor mold, larger infestations may require professional treatment to avoid spreading spores or damaging surfaces.
Adopt a post-shower habit – Wipe down ceiling corners or lightly mist with water-repelling spray to reduce condensation buildup. Small daily habits prevent major problems.
Integrate a seasonal deep check – At least twice a year, have a professional inspect your bathroom for hidden mold or leaks. Early detection saves money and stress.
By adopting these Mesh Maids–approved strategies, you’ll stay one step ahead of mold growth. From monitoring humidity to inspecting hidden corners, these little-known habits can save you time, money, and health risks.
Bonus-Tip: Do a ventilation test in your bathroom. Hold a square of toilet paper near your exhaust fan grille. If it doesn’t stay up, your fan isn’t working well enough.
Monthly Mold Prevention Checklist
Use this cleaning checklist every month to keep your bathroom fresh, dry, and mold-free.
Check Ventilation
- Ensure exhaust fans are working properly
- Run the fan during and after showers (at least 20 minutes)
- Keep a window slightly open if possible
Pro-Tip: Keeping your showerhead clean is necessary because not cleaning the showerhead properly can cause orange stains to it. If you face this problem, here is the detailed guidelines to how to clean orange stains in the shower.
Inspect Bathroom Ceiling and Corners
- Look for spots, stains, or discoloration
- Wipe down any signs of condensation or moisture buildup
- Pay attention to areas around light fixtures and vents
Clean High-Moisture Areas
- Scrub ceiling corners with a mold-preventive solution (vinegar or hydrogen peroxide)
- Wipe tiles and grout lines with antifungal cleaner
- Don’t forget behind mirrors and above shower enclosures
Bonus Tip: If you’re wondering how to clean cloudy mirrors, use a mix of water and vinegar, then buff it with a dry microfiber cloth for pristine shine.
Fix Leaks Immediately
- Check for any plumbing leaks or drips
- Tighten or replace loose fixtures and caulking
- Ensure toilet and sink areas are dry
Wash Shower Curtains and Mats
- Machine wash or sanitize these monthly
- Let them air dry fully before reuse
Declutter and Dry Out
- Remove unused products from the shower area
- Keep cabinet doors open for airflow if needed
- Use a dehumidifier in extremely humid climates
Following it regularly is one of the best ways for any homeowner to master how to prevent bathroom ceiling mold naturally and effectively.
Hidden Mold Zones (Most People) Miss in the Bathroom
Even after tackling the bathroom ceiling, mold can still linger in places that are easy to miss. Since mold thrives in warm, humid areas, knowing where to look beyond the obvious is key to stopping it for good. Here are some of the most common hidden mold spots that often escape attention:
1. Under and Behind Plumbing Fixtures
Moisture tends to gather where you can’t see it—like under sinks, behind toilets, or around the base of tubs and vanities. These damp, dark spaces are ideal for hidden mold growth, especially if there are minor leaks or poor seals.
2. Inside Grout Lines and Behind Tiles
Tiny cracks in grout or loose bathroom tiles can allow water to seep through. Over time, mold can begin to grow behind the wall or under the tile surface without any immediate signs. Watch for darkening grout or musty smells in your shower area.
3. Behind Bathroom Walls or Paneling
Mold can build up behind decorative paneling, wainscoting, or even drywall—especially if there’s a hidden leak or ongoing condensation. If paint is peeling or the surface feels soft, there may be mold underneath.
4. Inside Bathroom Cabinets
The space beneath your sink is particularly vulnerable. Leaky pipes or trapped humidity inside closed cabinets can lead to hidden mold colonies that often go unnoticed until they spread.
Pro-Tip: You need to know how to clean a bathroom sink for preventing mold in the bathroom.
5. Around Exhaust Fans and Vents
Bathroom fans are meant to fight moisture, but if they’re not working efficiently or are clogged with dust, they can trap humidity instead. Mold often grows in the vent housing or in the surrounding ceiling area where condensation gathers.
6. Ceiling Edges and Wall Joints
Even after ceiling mold is cleaned, spores can survive in the edges where the ceiling meets the wall—especially around crown molding or unsealed corners. These areas are often skipped during surface cleaning.
7. Along Baseboards and Flooring Seams
Moisture from showers or spills can trickle down to the floor, settling behind baseboards or in the seams of vinyl or wood flooring. Mold here can remain undetected until there’s a strong odor or visible damage.
8. Beneath Bathroom Rugs or Mats
Rugs that stay damp for hours—or never fully dry—can trap moisture underneath. Mold often grows between the mat and the flooring, especially in bathrooms without adequate ventilation.
9. Inside the Walls
If you’ve noticed a persistent musty smell but can’t locate the source, it might be inside the wall cavity. Water from pipe leaks or roof issues can result in deep-set mold growth that requires inspection or professional testing.
Why This Matters for Mold Removal:
To fully succeed at removing mold from your bathroom, you need to go beyond the visible. Mold can return if even a small colony remains hidden in these spots. By checking and addressing these hidden zones, you improve air quality, protect surfaces, and prevent mold from resurfacing.
Pro tip: Always inspect these hidden zones after cleaning your bathroom ceiling to prevent mold from coming back.
When to Call Cleaning Professionals
While DIY methods can be effective, there are times when mold growth is too severe, widespread, or stubborn to handle alone. Professional cleaning services like Mesh Maids will give you relief during your house cleaning process.
Taking the help of professional cleaners can not only eliminate the problem but also provide long-term solutions and advice on how to prevent bathroom ceiling mold from coming back.
Hiring a professional cleaning service gives you peace of mind and ensures your bathroom smells amazing, stays clean, safe, and mold-free for the long haul.
Book your cleaning and have a mold-free bathroom in your home.
Conclusion: A Mold-Free Bathroom Is a Healthier Bathroom
Now that you know how to remove mold from bathroom ceiling safely and effectively, you’re equipped to take action before it becomes a serious issue. With a few simple tools, the right natural cleaners, and consistent maintenance, you can reclaim your bathroom from mold and improve the air quality in your home.
Whether you’re tackling a small patch yourself or reaching out for professional help, the key is acting early and staying vigilant. Say goodbye to mold and hello to a cleaner, healthier bathroom!
Ever need a bathroom deep cleaning? Contact us. We’ll help you refresh your space and keep mold from coming back.
FAQs About Bathroom Ceiling Mold
Is mold on the bathroom ceiling dangerous?
Some molds, particularly black mold, can cause respiratory issues, allergic reactions, and skin irritation. Even non-toxic molds can degrade indoor air quality.
How often should I check for mold?
Monthly checks are ideal—especially during the rainy or humid season.
Can bleach be used to clean mold?
Yes, but it’s harsh and may discolor ceilings or damage paint. Natural alternatives like vinegar are safer for regular use.