
Introduction
How to clean a kitchen faucet head is a common question we hear from people when it comes to the kitchen. The easiest cleaning hacks include soaking the faucet head in vinegar, using baking soda to lift grime, scrubbing gently with an old toothbrush, flushing out debris with hot water, and finishing with a quick disinfecting wipe. Over time, faucet heads collect mineral deposits, grease, and bacteria that can reduce water flow and affect cleanliness.
At Mesh Maids, we’ve cleaned thousands of kitchens and know that small details like a clean faucet head make a big difference in overall hygiene. We see this buildup daily during professional deep cleans, and we also know what actually works—and what doesn’t.
Whether you’re handling routine house cleaning or tackling stubborn limescale in your kitchen, we’re here to guide you step by step and share practical solutions you can rely on. In this guide, we’ll show you exactly how to do it the right way, using simple DIY effective methods that fit into your everyday routine.
Why Cleaning Your Kitchen Faucet Head Matters

Through years of professional kitchen cleaning, we’ve learned that faucet heads are often overlooked. If you’re wondering why cleaning your kitchen faucet head matters, the simple answer is: it directly affects water quality, kitchen cleanliness, and the lifespan of your fixture. When you understand the benefits, regular cleaning becomes an easy habit that protects both your home and your health.
Improves Water Flow and Pressure
Mineral deposits, food particles, and sediment from hard water can clog the tiny holes in your kitchen faucet head. When this buildup occurs, you may notice weak water pressure, uneven spray patterns, or water spraying in unexpected directions. We regularly see this issue during deep kitchen cleaning, and the fix is often straightforward. When you clean your faucet head properly, you remove these blockages, allowing water to flow smoothly and evenly again.
Reduces Bacteria and Germ Buildup
Because faucet heads stay damp for long periods, they can become a hidden breeding ground for bacteria and germs. Each time you turn on the tap, these contaminants may come into contact with your hands, dishes, or food. We recommend routine faucet head cleaning because it helps remove harmful microorganisms that can compromise kitchen hygiene. When you keep this area clean, you reduce the risk of spreading germs and ensure the water you use every day remains safer.
Extends the Life of Your Faucet
Hard water minerals and limescale don’t just affect water flow—they can slowly damage the internal parts of your faucet head. Over time, this buildup may lead to corrosion, permanent staining, or even the need for early replacement. From our experience as cleaning professionals, regular cleaning is one of the simplest ways to protect your investment. When you remove residue before it hardens, you preserve both the appearance and functionality of your faucet for years to come. Moreover, consistent faucet cleaning helps preserve the finish—whether it’s stainless steel, chrome, or brushed nickel keeping your kitchen looking polished and well-maintained.
Supports a Healthier Kitchen Environment
You use your kitchen faucet on a daily purpose even for cleaning your veggies in the kitchen. A dirty faucet head can undermine these everyday activities without you realizing it. We believe a healthy kitchen starts with clean water points, and that includes the faucet head. When you take a few minutes to clean it regularly, you help maintain a fresher, more hygienic kitchen environment for you and your family.
Note* – Go for deep cleaning for better results in the kitchen.
Signs You Need to Clean Your Kitchen Faucet Head
Knowing when to clean your kitchen faucet head is just as important as knowing how to clean it. These warning signs often appear before you realize the buildup has become a problem. If you pay attention early, you can prevent poor water flow, hygiene concerns, and long-term damage.
Look out for these common signs that indicate your faucet head needs cleaning:
Reduced or uneven water flow
When mineral deposits clog the spray holes, water may trickle out weakly or spray unevenly. This is one of the earliest and most noticeable signs of buildup.
White or chalky mineral residue around spray holes
Hard water minerals often leave behind visible white or gray deposits. If left untreated, this residue can harden and become more difficult to remove.
Water splashing in unusual directions
Blocked spray holes force water to escape through random openings, causing messy splashing that makes everyday kitchen tasks frustrating.
Visible dirt or greasy residue on the faucet head
Grease, food particles, and dust can collect over time, especially in busy kitchens. This buildup affects both cleanliness and appearance.
Unpleasant odor coming from the water
A musty or stale smell may indicate bacteria trapped inside the faucet head. This is a clear sign that cleaning is overdue.
If you notice any of these issues, it’s time to clean your kitchen faucet head. Acting early helps restore proper water flow, improves hygiene, and keeps your kitchen running smoothly.
Pro-Tip: Add your kitchen faucet to your monthly cleaning checklist! Mark a quick 5-minute faucet check to look for weak water flow, chalky spots, or grime.
Easy Cleaning hacks to Clean your Faucet Head
We recommend keeping faucet head cleaning simple and effective. There are different cleaning hacks you can use.
How to Clean Kitchen Faucet Head with Vinegar
White distilled vinegar is one of the most powerful and natural solutions for cleaning kitchen faucet heads. It effectively dissolves hard water deposits, lime scale, and bacteria without the need for harsh chemicals.
However, caution is needed. Vinegar is acidic (with a pH of around 2.5) and can damage certain finishes like gold, bronze, or matte black. If your faucet head has a delicate coating, reduce soaking time or consider other methods.
Steps to Clean Kitchen Faucet with Vinegar Soak Method
Materials Needed:
- White distilled vinegar
- Plastic bag
- Rubber band
- Toothbrush or soft scrub brush
- Optional: baking soda
Instructions:
- Mix equal parts vinegar and warm water in a plastic bag.
- Place the bag over the kitchen faucet head, ensuring it’s fully submerged.
- Secure the bag with a rubber band and let it sit for 30–60 minutes (30 minutes max for sensitive finishes).
- Remove the bag and use a toothbrush to scrub off loosened deposits.
- Run hot water to flush remaining debris and dry with a clean cloth.
Pro Tip: For extra scrubbing power, add a tablespoon or two of baking soda to the vinegar mixture. Expect some fizz—it’s part of the cleaning action!
How to Clean Kitchen Faucet Head with Baking Soda Paste
If your faucet finish is delicate or you’d rather avoid vinegar altogether, baking soda is a safe and gentle option. Baking soda is mildly abrasive, making it ideal for removing grime without scratching stainless steel or chrome.
Materials Needed:
- Baking soda
- Small bowl
- Water or hydrogen peroxide
- Toothbrush or soft cloth
Instructions to Clean Your Kitchen Faucet Head with Baking Soda Paste:
- In a bowl, combine baking soda with a few drops of water or hydrogen peroxide to form a paste.
- Apply the paste to the kitchen faucet head, focusing on areas with buildup.
- Let it sit for 15–30 minutes.
- Scrub gently with a toothbrush or sponge.
- Rinse with warm water and dry thoroughly.
This method is particularly good for weekly maintenance and won’t damage modern finishes.
How to Clean Kitchen Faucet Head with Steam
If you’re looking for a chemical-free method to clean kitchen faucet heads, steam cleaning is the best option. Steam can loosen grime, kill bacteria, and lift calcium deposits without the need for any cleaner.
Materials Needed:
- Handheld steamer with brush attachment
- Microfiber cloth
Instructions: How to Use a Steamer on Your Kitchen Faucet:
- Fill your handheld steamer with water and allow it to heat.
- Gently direct steam onto the faucet head, especially where you see residue.
- Use the brush attachment to scrub softened buildup.
- Wipe clean with a microfiber towel.
Steam cleaning is especially useful in kitchens with hard water, and it’s safe for most faucet finishes.
How to Clean Kitchen Faucet Head with Citric Acid or CLR (With Caution)
For tougher mineral buildup, citric acid powder or a cleaner like CLR (Calcium, Lime, and Rust remover) can be used. However, both solutions are strong, and they can potentially damage soft or porous surfaces.
Materials Needed:
- Powdered citric acid or CLR
- Boiling water
- Plastic bag
- Rubber band
- Toothbrush
- Towel
Instructions: How to Clean Your Faucet Head with Citric Acid or CLR Safely
- Dissolve 3/4 cup of citric acid in 1 gallon of hot water (or dilute CLR as per the label).
- Fill a plastic bag with the solution and attach it to the kitchen faucet head.
- Let it soak for 10–30 minutes depending on the severity of buildup.
- Scrub with a toothbrush and rinse thoroughly.
- Always ventilate the kitchen and wear gloves if handling CLR.
Avoid this method on brass, gold, copper, or natural stone countertops like quartzite countertops.
When you use these easy cleaning hacks consistently, you can maintain a clean, high-performing faucet head with minimal effort.
How to Clean Kitchen Faucet Aerator for Better Water Flow
What Is an Aerator and Why It Matters
The aerator is the mesh screen at the tip of your faucet that controls water pressure and flow. It’s a hotspot for mineral deposits and grime, especially if you live in an area with hard water.
Steps to Clean the Aerator
Materials Needed: You need vinegar, a toothbrush, a small bowl, a towel, and pliers (optional)
Instructions to clean the Aerator:
- Try scrubbing the aerator with a toothbrush while still attached.
- If water flow is still poor, unscrew the aerator (use a towel and pliers if it’s stuck).
- Soak it in vinegar for 30 minutes.
- Scrub, rinse, and reassemble the parts in the correct order.
- Turn the water on to test for flow.
Cleaning the aerator every few months will help maintain a healthy kitchen faucet head and consistent water pressure.
What are the Different Types of Faucet Head
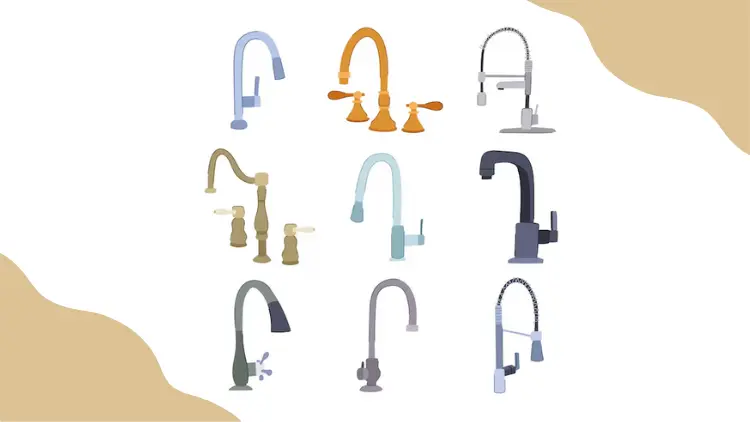
Before diving into how to clean kitchen faucet head, it’s important to understand the type of faucet you’re dealing with. Kitchen faucet heads come in various designs, each with its own features—and cleaning needs. Identifying your faucet type will help you choose the safest and most effective cleaning method.
1. Standard Aerator Faucet Head
This is the most common type found in kitchens. It has a built-in aerator that mixes air with water to reduce splashing and save water. These faucet heads can be easily unscrewed and soaked in vinegar to remove mineral buildup.
Best Way to Clean: Soak the aerator in a vinegar solution for 30 minutes, then scrub with a toothbrush and rinse.
2. Pull-Down Faucet Head
Pull-down faucet heads are attached to a retractable hose, making them highly functional for deep sinks and large pots. However, because of their movable parts and spray nozzles, they often trap more grime, soap residue, and hard water deposits.
Best Way to Clean: Use a soft brush and a baking soda paste to gently scrub the nozzle and base without damaging rubber or plastic parts.
3. Pull-Out Faucet Head
Similar to the pull-down style but designed for tighter spaces, pull-out faucet heads also benefit from regular deep cleaning. These faucet heads tend to accumulate buildup around the base and nozzle.
Best Way to Clean: Use a handheld steamer or warm vinegar-dipped cloth for safe, residue-free cleaning around flexible joints.
4. Touchless Faucet Head
Touchless faucets are modern, sleek, and hygienic—but require special care. Since they contain motion sensors and electronic components, avoid soaking them in water or applying vinegar directly near the sensor
Best Way to Clean: Wipe gently with a damp cloth and mild dish soap; use a brush only for the nozzle tip, away from sensors.
5. Spray/Stream Multi-Function Head
These faucet heads allow you to switch between stream and spray modes. Their complex internal parts mean more opportunities for mineral clogging and bacterial growth.
Best Way to Clean: Detach the spray head (if possible), soak it in a vinegar or citric acid solution, then clean spray holes with a pin or soft brush.
Tip: Wants to make your Kitchen sparkling clean, Check out 10 Genius Kitchen Cleaning Hacks.
How Often Should You Clean Kitchen Faucet Head?

We often remind homeowners that how often you clean your kitchen faucet head depends largely on your water quality, which means water hardness and how frequently the faucet is used. Kitchens with heavy daily use or hard water require more frequent attention to prevent mineral buildup and bacteria growth.
Recommended Cleaning Schedule from Mesh Maids
Based on our hands-on experience cleaning residential kitchens, we suggest the following routine:
- Light cleaning: Once every 2–3 weeks – A quick wipe-down and rinse help remove surface grime and prevent early mineral buildup.
- Deep cleaning: Once every 1–2 months – Soaking the faucet head and clearing spray holes ensures optimal water flow and hygiene.
- Hard water areas: Monthly deep cleaning is recommended – If you live in a hard water region, minerals accumulate faster, making regular deep cleaning essential.
By following a consistent cleaning schedule, you prevent heavy buildup before it becomes a problem, making each cleaning session faster, easier, and more effective. Regular maintenance not only improves water quality but also extends the life of your kitchen faucet head.
Tips to Keep Your Faucet Head Cleanliness Longer
We believe prevention is just as important as cleaning. When you adopt a few simple habits, you can keep your faucet head clean for longer and reduce the need for frequent deep cleanings.
- Wipe the faucet head weekly with a microfiber cloth – We suggest cleaning it once a week, which removes water spots, grease, and surface residue before they harden into mineral buildup.
- Run hot water for a few seconds after heavy use – Hot water helps flush out food particles and soap residue trapped inside the spray holes.
- Install a water softener if hard water is a recurring issue – Hard water accelerates mineral buildup, and softening your water can significantly slow limescale formation.
- Clean spray holes regularly to prevent mineral deposits – Light, routine attention keeps clogs from forming and maintains consistent water flow.
By following these small but effective habits, you extend the time between deep cleanings, protect your faucet head, and maintain a cleaner, healthier kitchen with less effort.
When You Need to Take Professional Help!
Sometimes, no matter how many DIY tricks you try, stubborn grime, hard water stains, or limescale just won’t budge. Go for Mesh Maids, a professional house cleaning service base company. The team trained to tackle even the toughest kitchen messes—including deep cleaning kitchen sink drain, faucet heads, countertops, and more.
Whether you’re preparing for a move, hosting guests, or just want to reset your home’s hygiene, Mesh Maids offers expert cleaning services that go beyond surface sparkle. Let us handle the tough stuff so you can enjoy a healthier, happier kitchen—without lifting a finger.
Book your clean today and experience the ease of cleaning!
Conclusion: A Healthier Kitchen Starts with a Clean Faucet Head
Your kitchen faucet is one of the most frequently used fixtures in the home, yet it’s easy to overlook. Mastering how to clean kitchen faucet head with safe, DIY methods not only enhances your kitchen’s appearance but also supports a healthier living environment. Whether you choose vinegar, baking soda, steam, or a commercial cleaner like CLR, the key is consistency. Kitchen Cleaning includes regular maintenance, prevents buildup, ensures smooth water flow, and reduces the risk of bacterial growth.
A clean faucet isn’t just a shiny detail—it reflects a well-maintained, hygienic kitchen. Make these simple cleaning steps a regular habit, and your faucet will reward you with clear, fresh water every day.
Ever feel like you get overburdened or need a helping hand? Contact us. Mesh Maids is always here to help you maintain a cleaner, healthier home.