
Introduction
Windows are the reflection of a clean home. They let in natural light and greatly enhance the look and feel of your home. Cleaning them, however, is often neglected from the house cleaning routine. That’s why we recommend steam cleaning as a smarter solution. With steam cleaning, you can tackle dirt, grime, streaks, and even hard water stains effectively. To do this, simply fill your steam cleaner with water, let it heat up, and use the steam over your glass and window frames. The hot vapor loosens dirt and sanitizes the surface, while a microfiber cloth or squeegee easily wipes away the debris. This method saves time, eliminates harsh chemicals, and leaves your windows streak-free with minimal effort.
It works on most types of glass and frames, from standard home windows to large patio doors. And if you’re living in North Vancouver and need professional support for house cleaning, you can rely on expert house cleaning services in North Vancouver.
In this guide, we’ll walk you through the process of steam cleaning your windows, so you can achieve sparkling results without any problem. We’ll also share the best tips and tricks that make the job easier and more efficient. By following this guide, you’ll save time and effort while keeping your windows cleaner, brighter, and streak-free.
What Is Steam Cleaning and How It Works
Working in the cleaning industry for years, we believe that the best cleaning methods should be powerful, safe, and efficient, and steam cleaning is one of those. Unlike traditional methods that rely on harsh chemicals and endless scrubbing, steam cleaning utilizes the natural power of heat and moisture to deliver spotless, streak-free results.
How Steam Cleaning Works
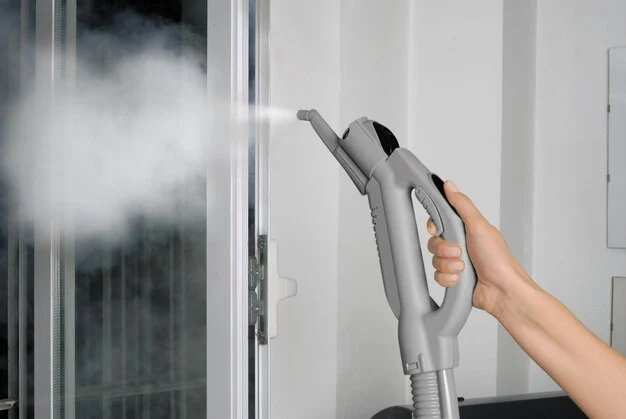
Instead of relying on physical force or abrasive cleaners, steam cleaning uses high-temperature vapors to break down dirt, grease, and grime from glass surfaces and window frames. When water is heated to a high temperature inside the steam cleaner, it transforms into pressurized vapor. This hot steam is then released through a nozzle, softening and lifting away stubborn buildup without damaging the glass.
We recommend using a handheld or cordless steam cleaner, as it’s lightweight and easy to work with. It helps you reach corners, edges, and even tall or narrow windows easily. Once the steam has loosened the dirt, simply wipe the surface clean using a microfiber cloth or a squeegee. The heat ensures that the surface dries quickly, leaving your windows crystal-clear and streak-free.
In addition to cleaning, it also works as a sanitizer. The high temperature kills bacteria, mold spores, and other germs naturally without using harsh disinfectants. This makes steam cleaning ideal for families with children, pets, or anyone sensitive to chemical cleaners.
Why Steam Cleaning Windows is the Best Method?
Before we jump into the step-by-step process, let’s take a moment to understand why steam cleaning has become one of the most preferred window-cleaning techniques for both homeowners and professionals. At Mesh Maids, we’ve seen how this method not only simplifies the cleaning process but also delivers results that traditional cleaning just can’t match. Here’s why we recommend steam cleaning for you and your home:
1. Chemical-Free Cleaning for a Healthier Home
Steam cleaning relies purely on the natural power of water. No harsh chemical sprays, no synthetic cleaners, and no lingering fumes are part of it. The high-temperature steam effectively loosens dirt and grime while keeping your indoor air clean and safe. We believe in cleaning that’s as healthy for your family and pets. With steam cleaning, you can enjoy spotless windows without worrying about chemical residues.
2. Powerful Deep Cleaning Action
Unlike regular wiping or spraying, steam cleaning goes deep into layers of dirt, grease, and buildup. The hot vapor softens and lifts even the most stubborn grime from dried rain spots to sticky fingerprints, which traditional methods often struggle with. We’ve seen how steam cleaning even helps in dissolving mineral deposits from hard water, and restores the original shine of your glass surfaces.
3. Faster, Easier, and More Efficient
If you’ve ever spent hours wiping windows, you’ll appreciate how quick and efficient steam cleaning is. The steam loosens dirt instantly, so you don’t have to scrub endlessly. Plus, since the process uses less water, your windows dry much faster. We recommend this method for anyone who wants professional-quality results in a fraction of the time.
4. Naturally Sanitizes and Freshens Surfaces
Steam doesn’t just clean, it also sanitizes. The high heat kills bacteria, mold spores, and germs on contact, leaving your windows not only clean but also hygienic. If you have kids, pets, or allergy sufferers at your home, this extra level of cleanliness can make a noticeable difference. At Mesh Maids, we often use steam cleaning for clients for truly fresh, allergen-free environment.
5. Crystal-Clear, Streak-Free Results Every Time
Nothing ruins your effort like streaks or cloudy residue. With the right technique, steam cleaning delivers a flawless, streak-free shine that enhances your home’s brightness. One smooth clean with a steam cleaner is enough to achieve that perfect shine.
With steam cleaning, you’re not just saving time; you’re upgrading your entire cleaning routine. We love this method because it blends efficiency, safety, and gives your windows a clean look with minimal effort.
What You Need to Steam Clean Windows
Before you begin, it’s important to have the right tools and materials ready. At Mesh Maids, we always emphasize preparation — it makes the entire steam cleaning process smoother, faster, and safer. When you have everything on hand, you can focus on cleaning efficiently without interruptions.
Here’s what you’ll need before getting started:
Basic Equipment
Steam Cleaner with Window Attachment:
Choose a steam cleaner specifically designed or equipped with a window or glass attachment. This ensures even steam distribution and prevents streaking. If you’re buying one, look for models with adjustable steam settings for different surfaces.
Microfiber Cloths:
Soft microfiber cloths are essential for wiping away loosened dirt and moisture. They absorb water quickly and leave behind a streak-free finish, which makes them ideal for glass surfaces.
Squeegee (Optional but Recommended):
For large or tall windows, a squeegee helps remove excess water efficiently and ensures a polished, streak-free shine. It also speeds up drying time.
Distilled Water:
Always use distilled water in your steam cleaner instead of tap water. It prevents mineral buildup inside the machine and eliminates the risk of leaving behind water spots on your windows.
Spray Bottle with Vinegar Solution (Optional):
For extra-tough stains or greasy marks, a mild vinegar and water solution can be used as a pre-treatment before steaming. This helps soften buildup for easier removal.
Safety Gear
Heat-Resistant Gloves:
Protect your hands from hot steam and accidental burns. Steam can be very hot, especially when cleaning edges or tight corners.
Safety Glasses (for Outdoor or High Windows):
If you’re cleaning upper-story or outdoor windows, wearing safety glasses can protect your eyes from hot steam and debris that may loosen during cleaning.
With these tools in your hands, you can enjoy a safe, efficient, and streak-free window even without the cleaning experience.
Is Steam Cleaning Good for All Kinds of Windows?
Steam cleaning is one of the most efficient, eco-friendly, and satisfying ways to get crystal-clear, streak-free windows. However, not all types of windows respond the same way to high heat and moisture. At Mesh Maids, we always remind our clients that understanding your window type is key to preventing accidental damage. The heat from the steam can sometimes affect older or delicate glass, especially if there are cracks, worn seals, or existing structural issues.
Here’s a breakdown to help you decide if your windows are suitable for steam cleaning:
Generally Safe to Steam Clean
Modern Double-Pane Windows with Intact Seals:
Most newer homes have double-pane or energy-efficient windows designed to handle temperature fluctuations. If the seals are intact, these windows can easily withstand steam cleaning.
Tempered or Safety Glass:
Common in patio doors, bathrooms, and newer constructions, tempered glass is heat-treated for durability. It can safely handle the steam cleaning process without risk of cracking or damage.
Standard Residential Glass (No Visible Cracks or Chips):
Everyday glass windows that are in good condition and free from structural damage respond well to steam cleaning. Just make sure to avoid holding the nozzle too close for too long.
Proceed with Caution
Older Single-Pane Windows:
Vintage or single-pane windows are thinner and more vulnerable to sudden temperature changes. Applying steam directly can cause thermal shock, leading to cracks or breakage.
Windows with Damaged or Broken Seals:
If your window seals are compromised, steam can seep between the panes, leading to fogging, condensation buildup, or further seal deterioration over time.
Frosted or Textured Glass:
While you can steam clean these surfaces, moisture may collect in grooves or etched areas. You’ll need to wipe thoroughly afterward to prevent streaks or water spots.
Mesh Maids’ Safety Tip:
If you’re unsure whether your windows can handle steam cleaning, test a small, inconspicuous area first. Set your steam cleaner to a low or medium setting, hold the nozzle a few inches away from the glass, and apply steam briefly. Observe for any signs of fogging, adhesive loosening, or cracking.
By taking this cautious approach, you can ensure your windows stay spotless and damage-free. At Mesh Maids, we always adapt our cleaning methods based on window type, so if you ever feel uncertain, it’s best to let professionals handle it safely and efficiently.
How to Steam Clean Windows: Step-by-Step Cleaning Guide
By following these simple steps, you can achieve crystal-clear, streak-free windows with minimal effort and zero harsh chemicals. Let’s walk you through the process:
Step 1: Prepare the Area
Before you begin, create a clean and safe space.
- Remove curtains, blinds, or any décor near the window that could get wet.
- Lay down towels or cloths on the windowsill to catch drips and prevent water spots.
- Give your window a light dusting first — this helps avoid spreading dirt once the steam hits the surface.
Mesh Maids Tip: A quick vacuum or duster around the frames and sills can make the entire process smoother.
Step 2: Fill the Steam Cleaner
- Pour distilled water into your steam cleaner to prevent mineral buildup (tap water can leave residue).
- Plug in the machine and allow it to heat up completely as per the manufacturer’s instructions — this ensures consistent steam pressure.
Pro Tip: Never overfill your steam cleaner, and always wait for the indicator light before starting.
Step 3: Pre-Treat Stubborn Stains (Optional)
For those tough spots — like hard water stains, fingerprints, or sticky residue — pre-treatment helps.
- Spray a light vinegar-and-water solution (1:1 ratio) directly on the stained area.
- Let it sit for 1–2 minutes before applying steam.
This step softens grime and makes it easier for steam to lift away buildup.
Step 4: Steam the Window Surface
Here comes the most interesting part!
- Hold the steam nozzle a few inches away from the glass surface.
- Move it slowly in vertical or horizontal strokes for even coverage.
- Focus extra time on corners and edges — these are common dirt-trap zones.
Mesh Maids Tip: Don’t hover too long in one spot; keep the steam moving to avoid overheating the glass.
Step 5: Wipe Down with a Microfiber Cloth
Immediately after steaming, use a clean microfiber cloth to wipe away loosened dirt and moisture.
- Microfiber traps dirt particles effectively and prevents streaks.
- Wipe in circular motions or in the same direction as your steam strokes for best results.
Step 6: Use a Squeegee for Large Windows
If you’re working on big windows or glass doors:
- Run a squeegee from top to bottom, overlapping slightly with each pass.
- Wipe the squeegee blade with a cloth after each stroke to prevent streaks.
This step ensures a clear, professional-grade finish.
Step 7: Clean Window Frames and Tracks
Steam isn’t just for the glass, it’s also perfect for frames, tracks, and sills.
- Direct the steam into tight corners and along tracks to loosen dirt.
- Wipe immediately with a microfiber cloth to remove grime, dust, and mold buildup.
Step 8: Dry and Polish
After cleaning, allow the windows to air dry completely.
- For a finishing touch, buff the glass with a dry microfiber cloth to achieve a brilliant shine.
- Step back and admire your streak-free, crystal-clear windows — all without harsh chemicals or heavy scrubbing.
At Mesh Maids, we’ve seen how steam cleaning transforms windows from dull to dazzling in minutes. Whether you’re tackling seasonal deep cleaning or just freshening up, these step-by-step instructions are a perfect choice to execute.
Tips for Effective Steam Cleaning Windows
To get the best results from steam cleaning, a few small habits and precautions can make a big difference. We always suggest that you to follow these tips to ensure windows are spotless, streak-free, and protected from damage. Here’s how you can do the same:
1. Work from Top to Bottom
Start cleaning at the top of the window and move downward. This way, any water or loosened dirt naturally drips onto areas you haven’t cleaned yet, preventing streaks or re-soiling.
2. Use Distilled Water
Always fill your steam cleaner with distilled water. Tap water can leave mineral deposits inside the machine and on your glass, which may reduce efficiency and cause unsightly spots on the window.
3. Maintain Regular Cleaning
Windows accumulate dirt over time, and letting grime build up makes cleaning harder. Try steam cleaning every few weeks to prevent stubborn stains, hard water marks, and dust buildup. Regular maintenance keeps your windows looking fresh with less effort.
4. Avoid Direct Sunlight
Steam evaporates quickly under bright sunlight, which can lead to streaks. Clean windows when the sun isn’t directly shining on them — early morning or late afternoon is ideal.
5. Test Small Areas First
If you’re using pre-treatments like vinegar or other solutions, test a small corner first to ensure there’s no adverse reaction with your glass or window frame. This is especially important for older or textured windows.
Mesh Maids Tip: Following these simple guidelines ensures your steam cleaning is not only effective but also safe, giving you crystal-clear windows with minimal effort.
Benefits of Steam Cleaning Windows
Steam cleaning your windows offers numerous advantages over traditional cleaning methods. We always recommend this approach because it’s not only efficient but also safer for your home and family. Here’s why steam cleaning is a smarter choice:
1. Eco-Friendly and Safe
Steam cleaning uses only water, eliminating the need for harsh chemicals or toxic sprays. This makes it safe for your family, pets, and the environment while still delivering sparkling, streak-free windows.
2. Reduces Physical Effort
Forget hours of scrubbing and bending over to reach tough spots. Steam cleaning loosens dirt and grime with minimal effort, making the process faster and less physically demanding.
3. Kills Bacteria and Mold
The high temperature of the steam naturally kills bacteria, mold, and germs, improving your indoor air quality. This is especially important for households with children, pets, or allergy sufferers.
4. Time-Saving
Steam cleaning is highly efficient, allowing you to clean multiple panes or large windows quickly. Less time spent on cleaning means more time enjoying your spotless, bright home.
5. Enhances Window Lifespan
Unlike abrasive scrubbing or harsh chemical cleaners that can damage glass or frames, steam cleaning is gentle yet effective. Regular use prevents scratches, preserves the integrity of window seals, and keeps your windows looking new for longer.
By choosing steam cleaning, you’re investing in a cleaner and healthier environment.
Steam Cleaning Windows vs Traditional Methods

| Feature | Steam Cleaning | Traditional Method |
| Uses chemicals? | No | Usually, yes |
| Leaves streaks? | Rarely | Often |
| Kills bacteria? | Yes | Likely no |
| Eco-friendly? | Yes | Not always |
| Effort level | Likely no | Yes |
By comparing we got to know that steam cleaning approach is more eco-friendly, less toxic and produce high and long lasting results.
When to Call in Professionals?
While steam cleaning windows can be a simple DIY task, there are situations where bringing in experts is the smarter, safer choice. Professional cleaners come equipped with right tools and years of experience to ensure the job is done efficiently without risking damage to your windows.
You should consider calling in the pros if:
Your windows have stubborn stains or heavy grime buildup
Kitchens, bathrooms, and high-traffic hallways in busy cities like Abbotsford, Surrey, and Burnaby can collect grease, soot, or dirt that standard home steamers may struggle to remove. Professionals know the right combination of steam temperature, cleaning techniques, and gentle scrubbing to restore your windows to a spotless finish. And if you’re running short on time, you can also go for same day cleaning.
You’re dealing with allergy or asthma triggers
Dust, pollen, mold spores, and pet dander can cling to windows and affect indoor air quality especially in areas like White Rock, Richmond, and North Vancouver where humidity is higher. Professional cleaning ensures a deeper sanitization that can make a noticeable difference for allergy-prone households.
If you need house cleaning services, contact us at Mesh Maids, we proudly serve homes across Canada including Vancouver, Toronto and beyond. Our trained team ensures your home remains spotless, safe, and long-lasting.
Conclusion: Achieve Sparkling Windows with Ease
Steam cleaning windows is a safe, efficient, and eco-friendly method that saves time, reduces effort, and gives streak-free, sparkling results. By following this step-by-step guide, you can refresh both interior and exterior windows, tackle stubborn stains, and maintain your windows’ shine without chemicals or harsh scrubbing.
Whether you choose steam cleaning or hire professional services like Mesh Maids, your windows will look brighter, cleaner, and more inviting, which enhances your home’s overall look.
With regular steam cleaning, proper maintenance, and attention to frames and tracks, you can enjoy crystal-clear windows.
Book your cleaning with Mesh Maids today and give your home a sparkling shine.
FAQs regarding Steam Cleaning Windows
1. Can I use tap water in my steam cleaner?
Yes, you can. But we recommend using distilled water. It prevents mineral buildup inside your steam cleaner and avoids spots on your windows.
2. Is steam cleaning safe for all types of windows?
Steam cleaning is generally safe for all glass windows. However, avoid using it on cracked glass, old seals, or delicate stained glass without consultation.
3. Do I need to use chemicals with a steam cleaner?
No. Steam cleaning alone is effective at removing dirt, grease, and grime. A mild vinegar solution can help with stubborn stains, but it is optional.
4. Can I steam clean exterior windows?
Yes, but be cautious with high or hard-to-reach windows. You can use a telescopic steam cleaner or take the help of a professional service may be safer.
5. How often should I steam clean my windows?
For best results, you can go for every 4–6 weeks, or more often if your windows accumulate dirt quickly.
6. Will steam cleaning leave streaks?
No, if done properly, steam cleaning does not leave streaks. But for the best results, you should use microfiber cloths, wipe excess moisture, and avoid direct sunlight to prevent streaking.