
Introduction
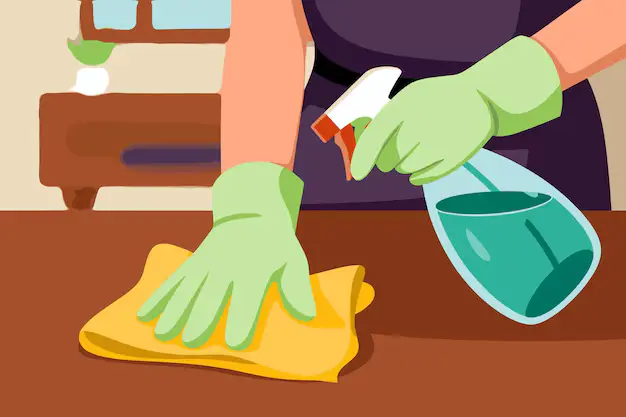
Dusters play an important role in cleaning for every home, and knowing how to clean your favorite duster makes a big difference in your cleaning results. You can clean your duster effectively by regularly removing trapped dust, washing it according to its material—such as rinsing microfiber or gently shaking and washing feather dusters—and allowing it to dry completely before reuse. When a duster becomes clogged with dust, hair, and debris, it stops working efficiently and may even spread dirt instead of removing it. By adopting these habits, you can maintain cleaner, healthier spaces. This approach is commonly used by trusted cleaning services in Richmond Hill.
At Mesh Maids, we believe that proper care of your cleaning tools is just as important as cleaning your home itself, especially when you want consistent, hygienic results with less effort.
As professionals, we understand that many homeowners focus on cleaning surfaces but often overlook the tools they use while house cleaning. Over time, an unclean duster can collect allergens, bacteria, and grime that end up back in your living space. Whether you use a feather duster, microfiber duster, or disposable option, knowing how to maintain it properly helps you clean smarter, protect your indoor air quality, and extend the life of your cleaning supplies. When your tools are well cared for, you save time, money, and energy.
In this guide, we walk you through simple, step-by-step methods to clean and care for your duster the best way. We’ll help you understand the different types of dusters, the best cleaning techniques for each, and common mistakes to avoid, so you can keep your cleaning tools fresh and effective every time you use them.
Why Cleaning Your Duster Matters
Before learning how to clean your favorite duster, it’s essential to understand why regular maintenance matters. As cleaning professionals, we know that even the best tools lose their effectiveness when they are not properly cared for. When you keep your duster clean, you improve not only your cleaning results but also the overall hygiene and comfort of your home.
1. Prevents Dust Redistribution
When a duster is filled with dust, it can no longer trap particles—it simply moves them from one surface to another. As cleaning experts, we’ve seen how this can undo your hard work in minutes. By cleaning your duster regularly, you ensure that dust is actually removed from your home rather than spread across furniture, shelves, and floors. This allows you to clean more efficiently and with greater confidence.
2. Improves Indoor Air Quality
Dust often contains allergens such as pollen, pet dander, dust mites, and fine debris that can affect your breathing and overall comfort. When you use a dirty duster, these particles can become airborne and circulate throughout your living space. We always encourage you to use clean tools, as a well-maintained duster helps reduce airborne dust and supports healthier indoor air quality for you and your family.
3. Extends the Life of Your Duster
Proper care plays a major role in how long your cleaning tools last. When dust and debris are left trapped in the fibers, they can cause clumping, stiffness, or breakage over time. From our experience as cleaning professionals, regular cleaning helps preserve the structure and performance of your duster. This means you won’t need to replace it as often, saving you time and money in the long run.
4. Supports Hygienic Cleaning
Using clean tools is a basic but essential part of hygienic home cleaning. When dusters are not cleaned properly, they can collect bacteria and grime that get transferred back onto surfaces. We recommend keeping your dusters fresh, especially when cleaning kitchens, bedrooms, children’s spaces, and pet areas. A clean duster allows you to maintain a more sanitary environment and achieve the level of cleanliness you expect from trusted cleaning experts.
Taken together, these points highlight the importance of duster cleaning.
Types of Dusters and How They Work

Not all dusters are designed the same way, and understanding the type of duster you use plays an important role in how effectively you clean and maintain it. As cleaning professionals, we know that choosing the right duster—and using it correctly makes a big difference. When you understand the usability of each, you can clean more efficiently.
Microfiber Dusters
Microfiber dusters are among the most popular choices for modern homes, and for good reason. They are made from fine synthetic fibers that create static electricity, allowing dust, dirt, and even microscopic particles to cling to the fabric. We often recommend microfiber dusters because they trap dust rather than pushing it into the air. When you use a microfiber duster properly, you can clean a wide range of surfaces, from shelves to electronics, while minimizing dust redistribution.
Feather Dusters
Feather dusters are typically made from natural feathers such as ostrich or turkey feathers. Their lightweight and flexible structure makes them ideal for delicate surfaces and hard-to-reach areas. From our experience, these dusters work best when you use them gently, allowing the feathers to collect light dust without applying pressure. For you, this means safer cleaning for fragile décor, picture frames, and decorative items.
Lambswool Dusters
Lambswool dusters are crafted from natural wool fibers and are known for their softness and effectiveness. These fibers naturally attract and hold onto dust, making them a great option for furniture, wood surfaces, and decorative pieces. We find that lambswool dusters are especially useful when you want to clean without scratching or damaging finishes like polished wood, glass surfaces, delicate electronics, antiques, artwork frames, stainless steel appliances, and high-gloss furniture. When you use one, you can maintain your home’s appearance while protecting valuable surfaces.
Electrostatic or Disposable Dusters
Electrostatic and disposable dusters rely on static charge to attract and trap dust particles. They often come with replaceable or single-use heads, making them a convenient option for quick cleanups. We’ve seen many of our clients choose these dusters for their ease of use and low maintenance.
Understanding the different types of dusters and how they work allows you to choose the right tool for each cleaning task. As cleaning professionals, we believe that when you know how your tools function, you can clean more efficiently and avoid unnecessary wear or damage.
How to Clean Your Favorite Duster: Step-by-Step Guide
Keeping your duster clean is essential for effective and hygienic home cleaning. As cleaning experts, we know that even high-quality dusters lose their ability to trap dust when they are not maintained properly. By following the right steps, you can restore your duster’s performance and ensure better cleaning results with every use.
How to Clean a Microfiber Duster
Microfiber dusters are known for their durability, versatility, and excellent dust-trapping ability. We, as cleaning experts, often recommend them because they are easy to maintain when cleaned correctly. Here’s how you can keep your microfiber duster in top condition.
Step 1: Shake Off Loose Dust
Before washing, take your microfiber duster outdoors or hold it over a trash bin and gently shake it. This step helps remove loose dust, hair, and debris that have collected in the fibers. We always suggest doing this first, as it prevents excess dirt from settling deeper into the fabric during washing.
Step 2: Hand Wash or Machine Wash
You can wash your microfiber duster either by hand or in the washing machine. Use warm water and a mild detergent to break down dirt without damaging the fibers. As cleaning professionals, we advise you to avoid bleach and fabric softeners, as these products can coat or weaken microfiber fibers and reduce their ability to trap dust effectively.
Step 3: Rinse Thoroughly
After washing, rinse the duster thoroughly to remove all soap residue. Leftover detergent can cause the fibers to stiffen, making the duster less effective during future use. We recommend rinsing until the water runs clear, ensuring the microfiber stays soft and flexible.
Step 4: Air Dry Completely
Once clean, hang the duster or lay it flat in a well-ventilated area to air dry completely. Allowing it to dry naturally helps preserve the microfiber’s structure and performance. As cleaning experts, we generally suggest avoiding machine drying unless the manufacturer specifically allows it, as high heat can damage the fibers.
How to Clean a Feather Duster
Feather dusters require gentle handling to maintain their shape and effectiveness. As cleaning professionals, we know that improper washing or rough handling can damage delicate feathers and reduce their ability to collect dust. When you care for a feather duster correctly, it remains lightweight, flexible, and effective for a long time.
Step 1: Remove Surface Dust
Begin by taking the feather duster outside or over a trash bin and gently shaking it. This helps loosen and remove surface dust before washing. We recommend this step because it prevents dirt from settling deeper into the feathers during cleaning and makes the washing process more effective.
Step 2: Wash Carefully
Fill a basin with lukewarm water and add a small amount of mild soap. Submerge the feather duster and gently swirl it in the water. Cleaning experts advise avoiding vigorous movement or bending the feathers, as this can cause them to lose their natural shape and softness. Allow the soap to lift the dirt while you handle the duster with care.
Step 3: Rinse and Reshape
Rinse the duster thoroughly with clean water to remove all soap residue. Gently squeeze out excess water without twisting or wringing the feathers. As cleaning professionals, we recommend lightly reshaping the feathers with your hands to help them regain their natural form before drying.
Step 4: Dry Properly
Hang the feather duster upside down or lay it flat in a well-ventilated area and allow it to dry completely. Proper drying helps maintain the fluffiness and flexibility of the feathers. Cleaning experts also suggest keeping the duster away from direct heat or sunlight, as this can make the feathers brittle.
How to Clean a Lambswool Duster
Lambswool dusters are made from natural fibers, which makes them both effective and delicate. According to our experience, we know that these dusters require extra care to maintain their softness and dust-trapping ability. When you clean a lambswool duster properly, you protect its natural structure and ensure long-lasting performance.
Step 1: Shake and Brush
Start by gently shaking the duster outdoors or over a trash bin to remove loose dust and debris. After shaking, lightly brush the wool fibers using your fingers to separate them. Cleaning experts recommend this step to prevent matting and to prepare the fibers for washing.
Step 2: Gentle Hand Wash
Fill a basin with cool water and add a small amount of wool-safe detergent. Submerge the lambswool duster and gently move it through the water. We advise you to avoid scrubbing, twisting, or applying pressure, as rough handling can damage the wool fibers and reduce their effectiveness.
Step 3: Rinse and Squeeze
Rinse the duster thoroughly with clean water to remove all detergent residue. Gently squeeze out excess water without wringing or twisting. From our experience as cleaning professionals, this careful approach helps maintain the wool’s natural softness and shape.
Step 4: Air Dry and Fluff
Lay the duster flat or hang it in a well-ventilated area and allow it to air dry naturally. Once completely dry, gently fluff the wool with your hands to restore its fullness. Proper drying and fluffing help preserve the duster’s performance and extend its lifespan.
How to Clean an Electrostatic or Disposable Duster
Electrostatic and disposable dusters are designed for convenience and require less maintenance than traditional options. However, from our expertise as cleaning professionals, we know that even these dusters need proper care to remain effective. When you use and maintain them correctly, you can achieve cleaner surfaces while avoiding unnecessary dust spread.
Caring for Reusable Electrostatic Duster Heads
If your electrostatic duster comes with a reusable head, regular maintenance is still important. After each use, gently shake off trapped dust and debris to restore the duster’s static charge. Some reusable heads can be hand washed with mild soap, but we always advise you to check the manufacturer’s instructions first. Cleaning experts recommend washing only when necessary and allowing the head to air dry completely before reuse. Using it while damp can reduce its effectiveness and attract more dust.
Using Disposable Duster Heads Properly
Disposable duster heads are designed for single-use convenience and should not be washed. Once they become heavily soiled or stop trapping dust effectively, it’s time to replace them. Based on our experience working with clients, continuing to use a worn-out disposable head often leads to dust redistribution rather than proper removal. Replacing it promptly ensures better cleaning results and a more hygienic environment.
Follow Manufacturer Guidelines
Whether you use reusable or disposable electrostatic dusters, we always recommend to follow the manufacturer’s care instructions. As cleaning professionals, we rely on these guidelines to protect the integrity of the product and maintain consistent results. For you, this means safer cleaning, better performance, and tools that work as intended.
At Mesh Maids, we believe that even the most convenient cleaning tools perform best when used with care and intention. From our expertise, we know that small maintenance habits make a big difference. When you take these simple steps, you not only extend the life of your duster but also enjoy cleaner surfaces and a more efficient cleaning routine you can rely on.
How Often Should You Clean Your Duster?
The frequency of cleaning your duster depends largely on how often you use it and your home’s specific needs. From our experience as cleaning experts at Mesh Maids, following a consistent schedule helps maintain performance and prevents dust from spreading back onto surfaces.
For light household use, we recommend cleaning your duster once every one to two weeks. This is usually sufficient to keep it effective for routine dusting. If your home requires heavy or daily dusting, such as high-traffic areas or busy households, it’s best to clean the duster after every few uses to maintain proper dust-trapping ability.
In allergy-sensitive homes, where dust, pollen, or pet dander can trigger discomfort, cleaning the duster after each cleaning session is strongly advised. This reduces allergen buildup and helps maintain a healthier indoor environment.
Regular maintenance not only improves cleaning results but also extends the life of your duster. By staying consistent, you ensure your tools work efficiently and deliver the high standard of cleanliness you expect.
Common Mistakes to Avoid When Cleaning a Duster
Even small mistakes can affect how well your duster works. From our expertise at Mesh Maids, we often see clients unintentionally reducing their duster’s effectiveness. Here are some pitfalls to watch out for:
Using Harsh Chemicals
Strong detergents, bleach, or fabric softeners can damage the delicate fibers of your duster. This reduces its ability to attract and trap dust effectively, making your cleaning efforts less efficient.
Washing with Heavy Fabrics
Microfiber or electrostatic dusters should never be washed with towels, jeans, or other heavy fabrics. Lint from these items can cling to your duster, creating more work for you during your next cleaning session.
Drying with Heat
High heat from dryers can shrink natural fibers or melt synthetic ones. To preserve your duster’s structure and performance, always air dry it completely.
Storing While Damp
Never store a duster that is still damp. Moisture can lead to mold, unpleasant odors, and reduced lifespan. Make sure your duster is fully dry before putting it away.
By avoiding these common mistakes, you maintain your duster’s performance and ensure a cleaner, healthier home every time you use it.
Best Practices for Storing Your Duster
Proper storage is just as important as regular cleaning when it comes to maintaining the effectiveness of your duster. From our expertise as cleaning professionals, we’ve seen that even the highest-quality dusters can lose their dust-trapping ability if stored incorrectly. By following a few simple guidelines, you can extend the life of your tools and make each cleaning session more efficient.
Always store your duster in a dry, well-ventilated area. Moist environments can lead to mold growth or unpleasant odors, which not only affect the duster but can also impact the surfaces you clean.
Whenever possible, hang your dusters rather than placing them in drawers or cramped storage spaces. Hanging helps preserve the shape of the fibers and prevents them from becoming compressed, which can reduce their ability to attract and hold dust.
Avoid compressing the fibers in any way. Overcrowded drawers, heavy objects on top, or tightly packed storage bags can flatten the duster, making it less effective over time.
It’s also important to keep your duster away from direct sunlight, as prolonged exposure can weaken synthetic fibers or fade natural ones. Properly stored, your duster remains flexible, resilient, and ready for use whenever you need it.
By adopting these storage practices, you not only maintain the shape and performance of your duster but also make your cleaning routine easier and more efficient.
How Professional Cleaning Improves Overall Home Cleaning
Professional cleaning plays a crucial role in maintaining a consistently clean, healthy, and well-organized home. It is much needed after the post-construction or post-renovation of your home. From our expertise that we’ve gained through working closely with clients, we know that professional cleaning goes far beyond basic surface cleaning and delivers results that are both visible and long-lasting.
- Deeper and more thorough cleaning
Professional cleaners follow structured cleaning methods that target hidden dust, grime, and bacteria. This ensures areas that are often overlooked during routine cleaning receive proper attention. - Healthier living environment
By reducing dust, allergens, and pollutants, professional cleaning supports better indoor air quality. This is especially beneficial for households with children, pets, or allergy sensitivities. - Efficient use of time and effort
With experienced cleaners handling the workload, you save valuable time and avoid physical strain. Clients often find that professional cleaning allows them to enjoy a clean home without disrupting their daily routine. - Proper care for surfaces and materials
Cleaning professionals use the right tools and techniques for different surfaces, helping prevent scratches, discoloration, or long-term damage. This preserves the condition and appearance of your home. - Improved cleanliness between cleanings
A professionally cleaned home stays cleaner for longer. Once built-up dirt and dust are removed, regular upkeep becomes easier and more effective for you. - Consistent standards of cleanliness
Professional cleaning establishes a higher benchmark for home care. Over time, this consistency helps maintain order, hygiene, and overall comfort throughout your living space.
By integrating professional cleaning into your routine, you enhance overall home cleanliness while enjoying better health, convenience, and long-term results. Contact us for all your home cleaning needs.
Conclusion
Understanding how to clean your favorite duster is a simple yet powerful step toward maintaining a cleaner and healthier home. For beginners, proper duster care may seem like a small detail, but from our expertise working with clients, we know it has a direct impact on cleaning efficiency, surface hygiene, and overall results.
By identifying your duster type, cleaning it correctly, avoiding common mistakes, and storing it properly, you set yourself up for better outcomes every time you clean. A well-maintained duster not only removes dust effectively but also prevents dust from being redistributed across your home. It helps reduce allergens, protects delicate surfaces, and allows you to clean with less effort and more confidence.
We consistently see that clients who care for their cleaning tools achieve longer-lasting results and a more organized routine. When you treat your duster as an essential cleaning tool rather than a disposable item, you improve both performance and longevity. With the right habits in place, you can enjoy a cleaner space, better air quality, and a more efficient cleaning routine every day. Book professional cleaning with Mesh Maids and make your house dust-free.